
A friend of mine recently asked me to make a cake for his cousin's birthday, and I was more than happy to commission a cake for him. I'm always looking for an excuse to bake keke. After chatting a bit, my options came down to either Red Velvet or Chocolate, but you really can't go wrong with Chocolate. I thought that I'd step it up a notch and make a Chocolate Chiffon cake, a lighter, fluffier chocolate cake, so I went searching for a good recipe and I came across this one. (This site is actually one of the first places I go for baking inspiration and recipes.) Although the ingredients are all the same, I did a few things slightly differently.
Chocolate Chiffon Cake
with Cream Cheese Frosting and Strawberries

- 6 egg yolks
- 7 egg whites
- 2 cups cake flour (sifted)
- 1/4 cup unsweetened cocoa powder
- 1 1/2 cups granulated white sugar (split into 2 parts of 3/4 cups)
- 2 tsp baking powder
- 1/4 tsp baking soda
- 1/2 tsp salt
- 1/2 cup oil (canola, corn, or vegetable)
- 3/4 water
- 1 1/2 tsp vanilla extract
- 2 cups (estimated) strawberries (or other fruit of your choice)
Begin by preheating the oven to 325 degrees.
In a large bowl, sift together flour, cocoa powder, the first 3/4 cups of sugar, baking powder, baking soda, and salt.
In another bowl take your egg yolks, oil, water, and vanilla and whisk them together. Then take your dry ingredients, make a well in the center, and add in the wet ingredients you just mixed. The well in the center of your dry ingredients should look like the picture on the left. Mix the wet and dry ingredients until smooth and completely combined and scrape the sides as you go to ensure that everything is mixed well.
With either a stand mixer with a whisk attachment or a hand mixer in a separate bowl, beat the egg whites until it becomes white and foamy, then gradually begin to add the last of the sugar (3/4 cups) and continue beating until you get almost stiff peaks. You can also add 1/2 tsp cream of tartar or a couple drops of lemon juice in order to make sure you don't over beat the egg whites, but this is not necessary.


 The original recipe calls for you to pour the batter into an ungreased tube/bundt pan, however for the purpose of making a more traditional-looking birthday cake, I decided to use two 9-in pans instead and greased them using a non-stick baking spray (different from non-stick cooking sprays, but they can work too).
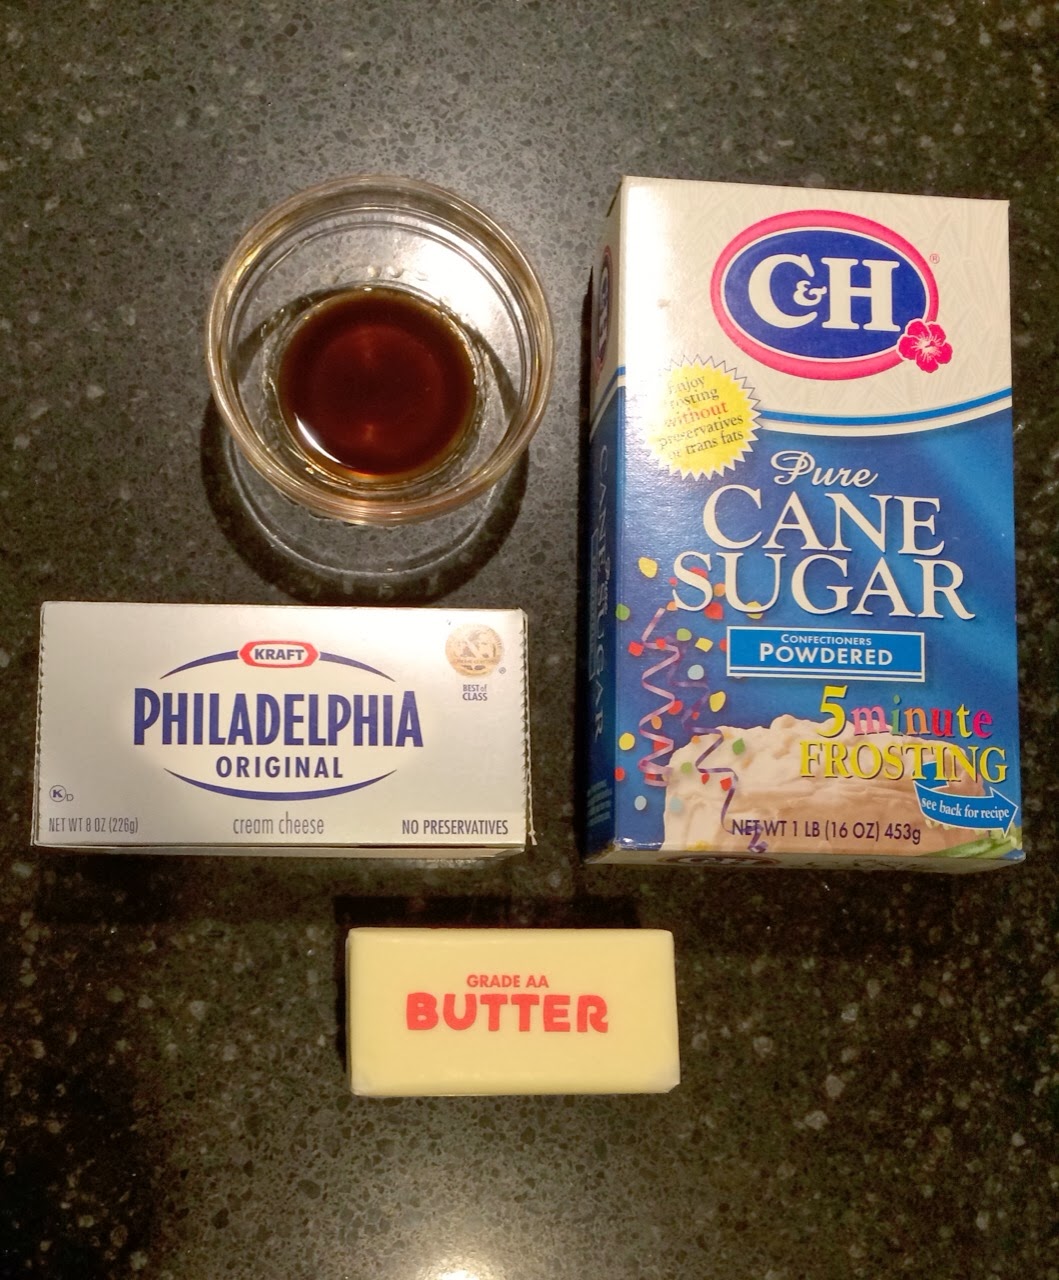
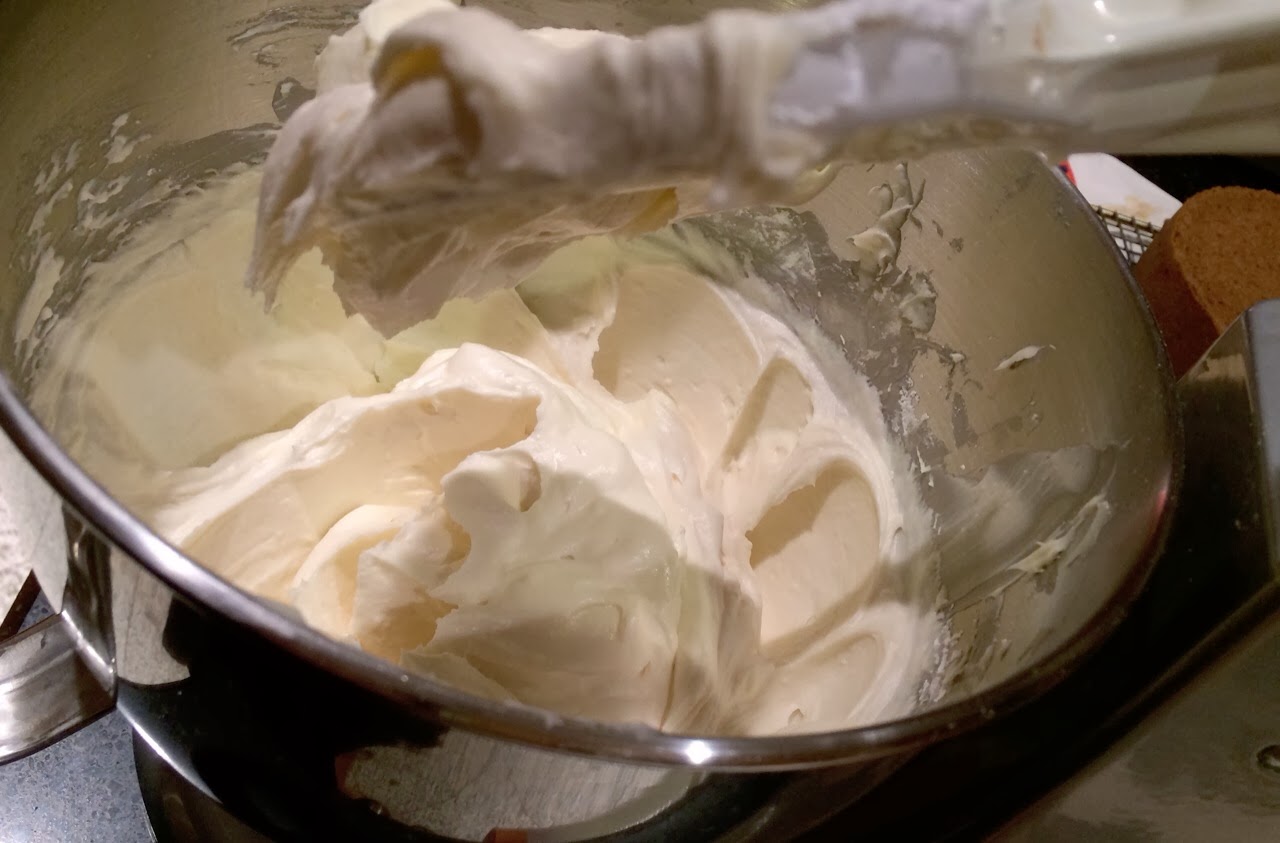 In a stand mixer with a paddle attachment, or a hand mixer in a separate bowl, beat together the room temp. butter and cream cheese until fluffy. Add vanilla and continue to mix until combined. Mix in confectioner's sugar, a cup at a time, until your desired sweetness is achieved. I only used 2 cups confectioner's sugar because I, personally, don't like super sweet frosting. Mix until powdered sugar is combined. If your frosting is still lumpy, don't worry, just keep mixing until completely smooth which could range from 5-10 minutes depending how long you had your butter and cream cheese sit out (which in my case, wasn't very long). Let your completed frosting sit out at room temperature. Room temperature cream cheese frosting will be easier to spread later on.
Once you've got your two even layers, lay the first one on a cardboard cake round. I placed the cardboard round on a Lazy Susan and then on a cake stand to make icing the cake easier. Then is when I start washing and cutting the strawberries into thin slices. Place them onto a paper towel to soak up any extra moisture. You don't want water getting into the frosting. You may or may not use all of the strawberries.


In a large bowl, sift together flour, cocoa powder, the first 3/4 cups of sugar, baking powder, baking soda, and salt.
 |
| Well in dry ingredients |
In another bowl take your egg yolks, oil, water, and vanilla and whisk them together. Then take your dry ingredients, make a well in the center, and add in the wet ingredients you just mixed. The well in the center of your dry ingredients should look like the picture on the left. Mix the wet and dry ingredients until smooth and completely combined and scrape the sides as you go to ensure that everything is mixed well.
With either a stand mixer with a whisk attachment or a hand mixer in a separate bowl, beat the egg whites until it becomes white and foamy, then gradually begin to add the last of the sugar (3/4 cups) and continue beating until you get almost stiff peaks. You can also add 1/2 tsp cream of tartar or a couple drops of lemon juice in order to make sure you don't over beat the egg whites, but this is not necessary.
Using a large rubber spatula, gently fold in your egg white mixture into the chocolate batter in two or three parts until just combined, because you don't want to take all of the air out of the batter or it'll take away the cake's fluffiness and delicate texture. As you fold, you should be able to feel the lightness of the batter.
The original recipe calls for you to pour the batter into an ungreased tube/bundt pan, however for the purpose of making a more traditional-looking birthday cake, I decided to use two 9-in pans instead and greased them using a non-stick baking spray (different from non-stick cooking sprays, but they can work too).
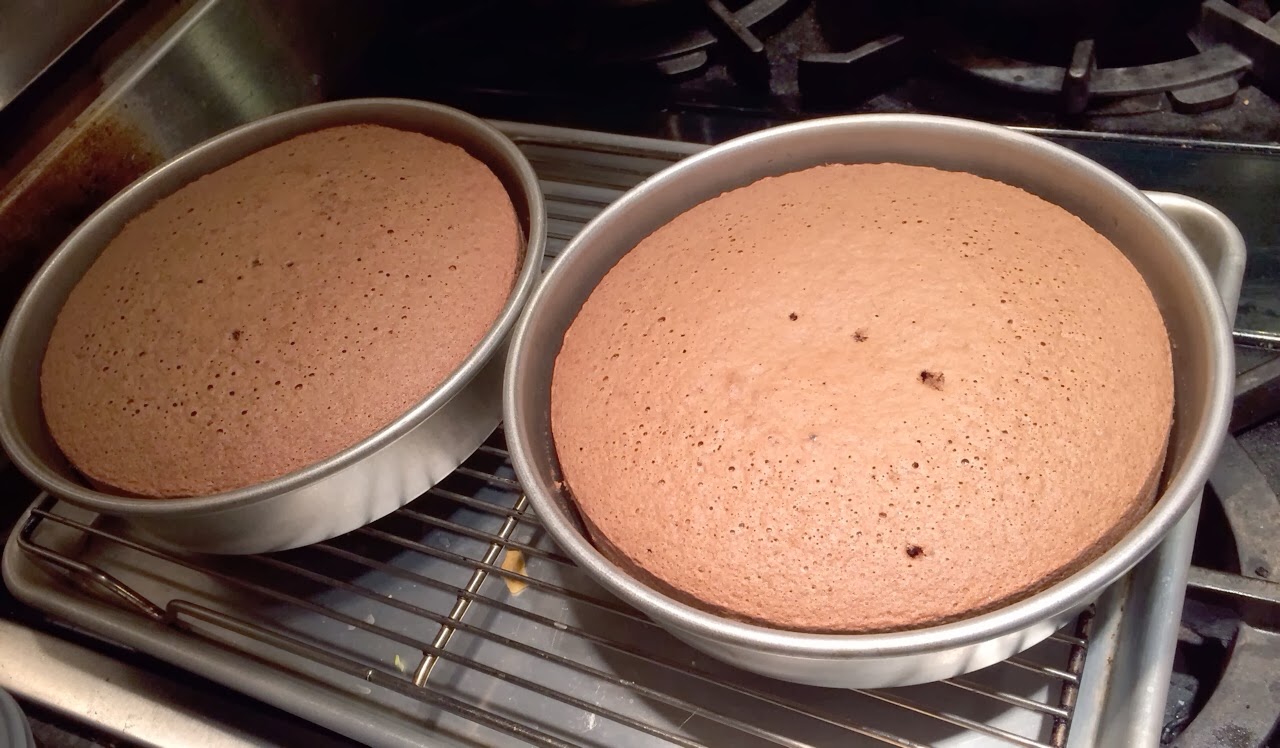
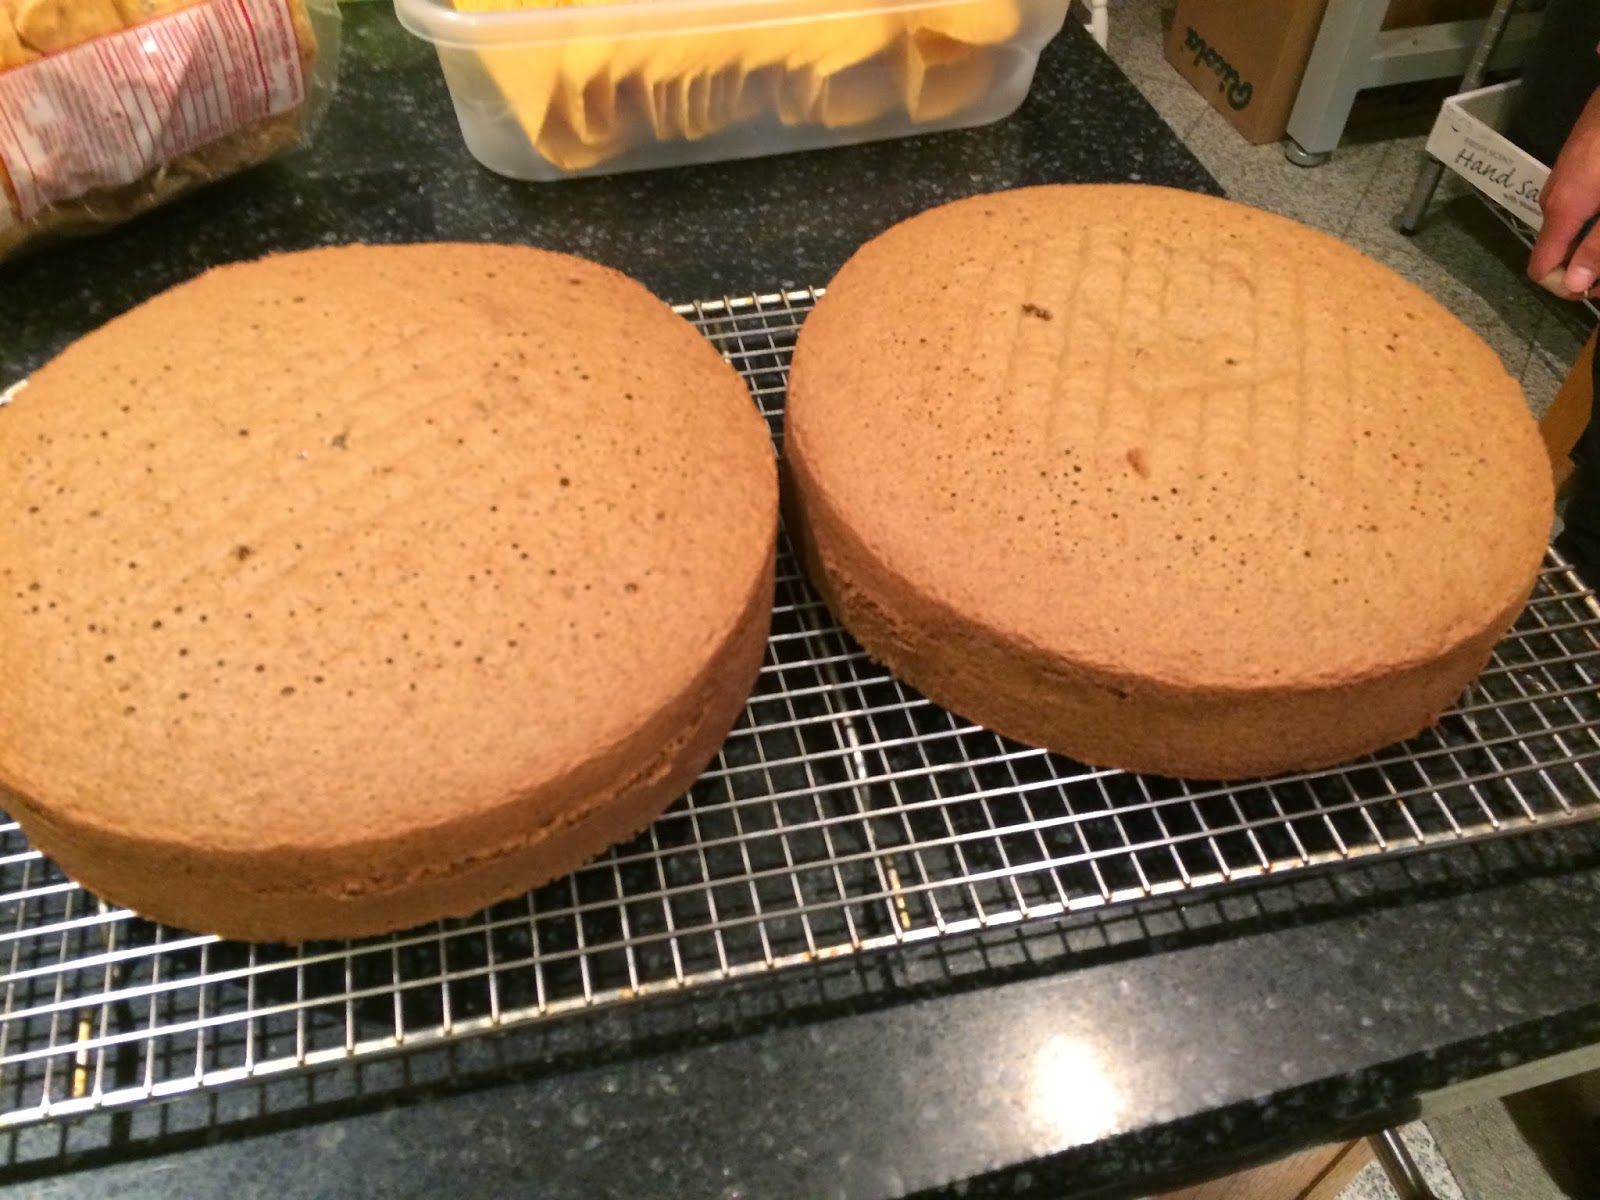
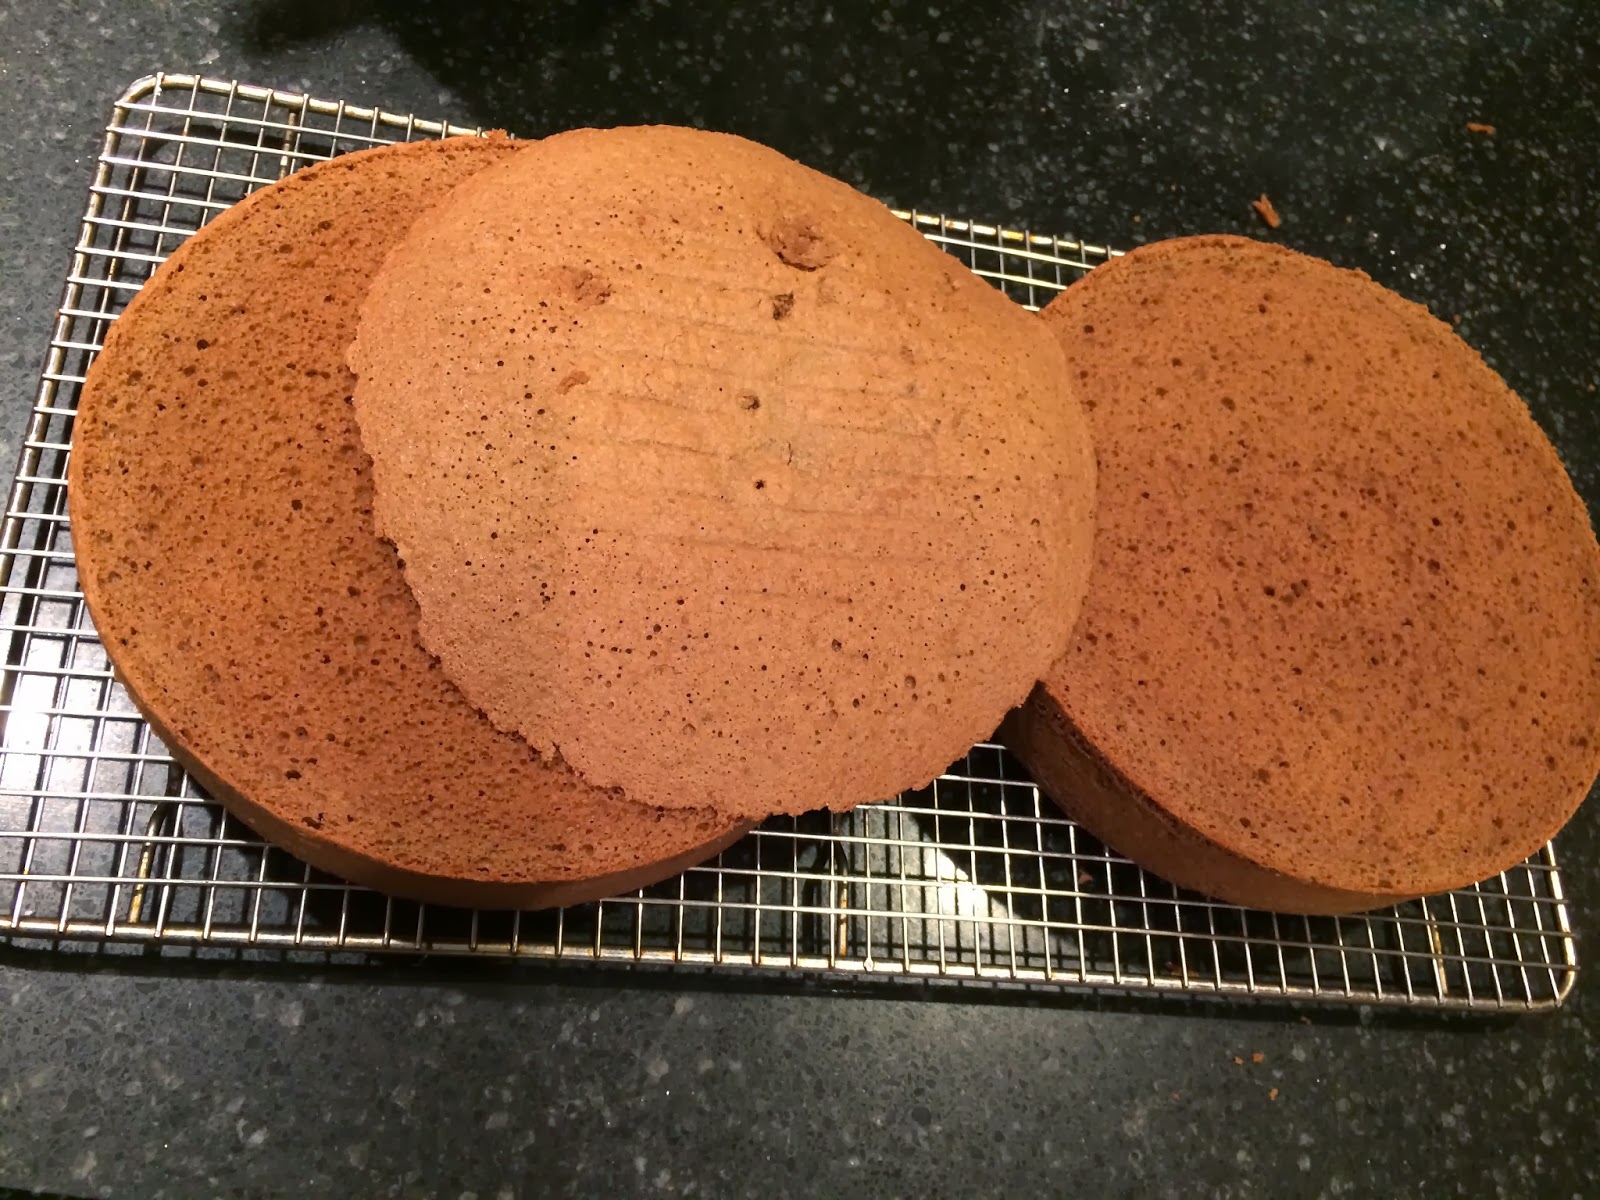
Place them in the 350 degree oven and bake for 35 minutes. Keep in mind that this time could be different for your oven. You'll know that they're finished baking when you insert a wooden skewer and it comes out clean. Set the pans on a cooling rack for 15-30 minutes, then flip them to remove the cakes. The cake should have shrunk a little bit (as seen below) and should come out easily.
Allow the cake to completely cool for at least 1-2 hours, in which time we can make the cream cheese frosting.
- 1 cup (2 sticks) butter (room temperature)
- 2 8oz packs cream cheese (room temperature)
- 2-6 cups confectioner's sugar
- 2 tsp vanilla extract
In a stand mixer with a paddle attachment, or a hand mixer in a separate bowl, beat together the room temp. butter and cream cheese until fluffy. Add vanilla and continue to mix until combined. Mix in confectioner's sugar, a cup at a time, until your desired sweetness is achieved. I only used 2 cups confectioner's sugar because I, personally, don't like super sweet frosting. Mix until powdered sugar is combined. If your frosting is still lumpy, don't worry, just keep mixing until completely smooth which could range from 5-10 minutes depending how long you had your butter and cream cheese sit out (which in my case, wasn't very long). Let your completed frosting sit out at room temperature. Room temperature cream cheese frosting will be easier to spread later on.
When the cake is completely cooled, level out the rounded cake tops. If you have extraordinary knife skills, feel free to use a knife, but if you're like me, I'd use a nifty tool called a cake leveler (great name, huh?). Set the wire to the desired height (I set the one I used to 5), place the legs on a flat surface leveled with the cake and basically cut off the top by sawing against the flat surface. It's a pretty great contraption and definitely gets the job done.
 |
Once you've got your two even layers, lay the first one on a cardboard cake round. I placed the cardboard round on a Lazy Susan and then on a cake stand to make icing the cake easier. Then is when I start washing and cutting the strawberries into thin slices. Place them onto a paper towel to soak up any extra moisture. You don't want water getting into the frosting. You may or may not use all of the strawberries.
When your strawberries are cut, spread out a thin layer of frosting on your first layer. It doesn't have to be super neat. Place your strawberries onto the frosting then gently lay your second layer of cake on top and align them.
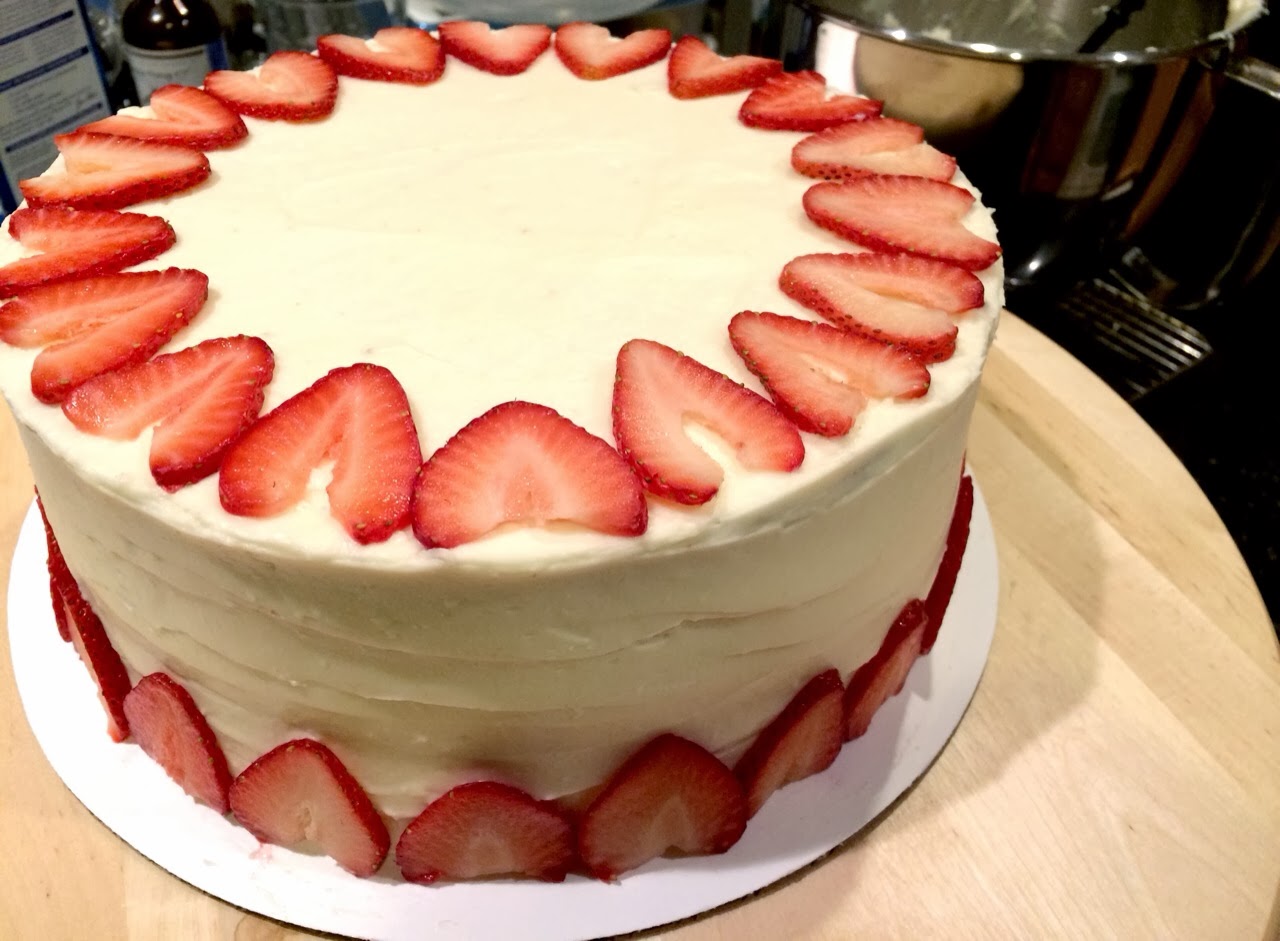
Apply a thicker layer of frosting on top and sides and frost entire cake. I used an offset spatula for this. Keep in mind, I have never completely frosted a cake before this, so clearly I am no professional, but I guess for a first time, my results were decent.
I was pleased with the top of my cake because it turned out pretty smooth. I can't really say the same about the sides, but the strawberry garnish made it much better. Place the strawberries how you want on your cake and you're finished!
And I have received word that my cake was a hit! Thanks to my very first "clients" and happy birthday!


.jpg)

.jpg)
.jpg)