Showing posts with label recipe. Show all posts

Monday, September 8, 2014

Recipe: White Chocolate Macadamia Nut Cookies

The weather has been pretty gloomy around here lately. It's wet and rainy, but this is my kind of weather! I know not everyone's crazy about rain showers and the end of summer, but that's okay because I have the perfect pick-me-up. Who doesn't love White Chocolate Macadamia Nut cookies?!

White Chocolate Macadamia Nut Cookies

makes 24 cookies


You will need:
  • 3 cups all purpose flour
  • 1 tsp baking soda
  • 1/2 tsp salt
  • 1 cup (2 sticks) *unsalted butter (room temp)
  • 1 cup packed light brown sugar
  • 2/3 cup granulated sugar
  • 2 large eggs (room temp)
  • 1 1/2 tsp vanilla extract
  • 1/2 tsp almond extract
  • 1 cup white chocolate chips
  • 1 cup coarsely chopped salted macadamia nuts
*If you do not have unsalted butter, it may be substituted with regular butter. However, omit the 1/2 tsp of salt.

Begin by preheating your oven to 325 degrees Fahrenheit and line two baking sheets with parchment paper or silicon mats.

In a separate bowl, mix together the flour, baking soda, and salt.


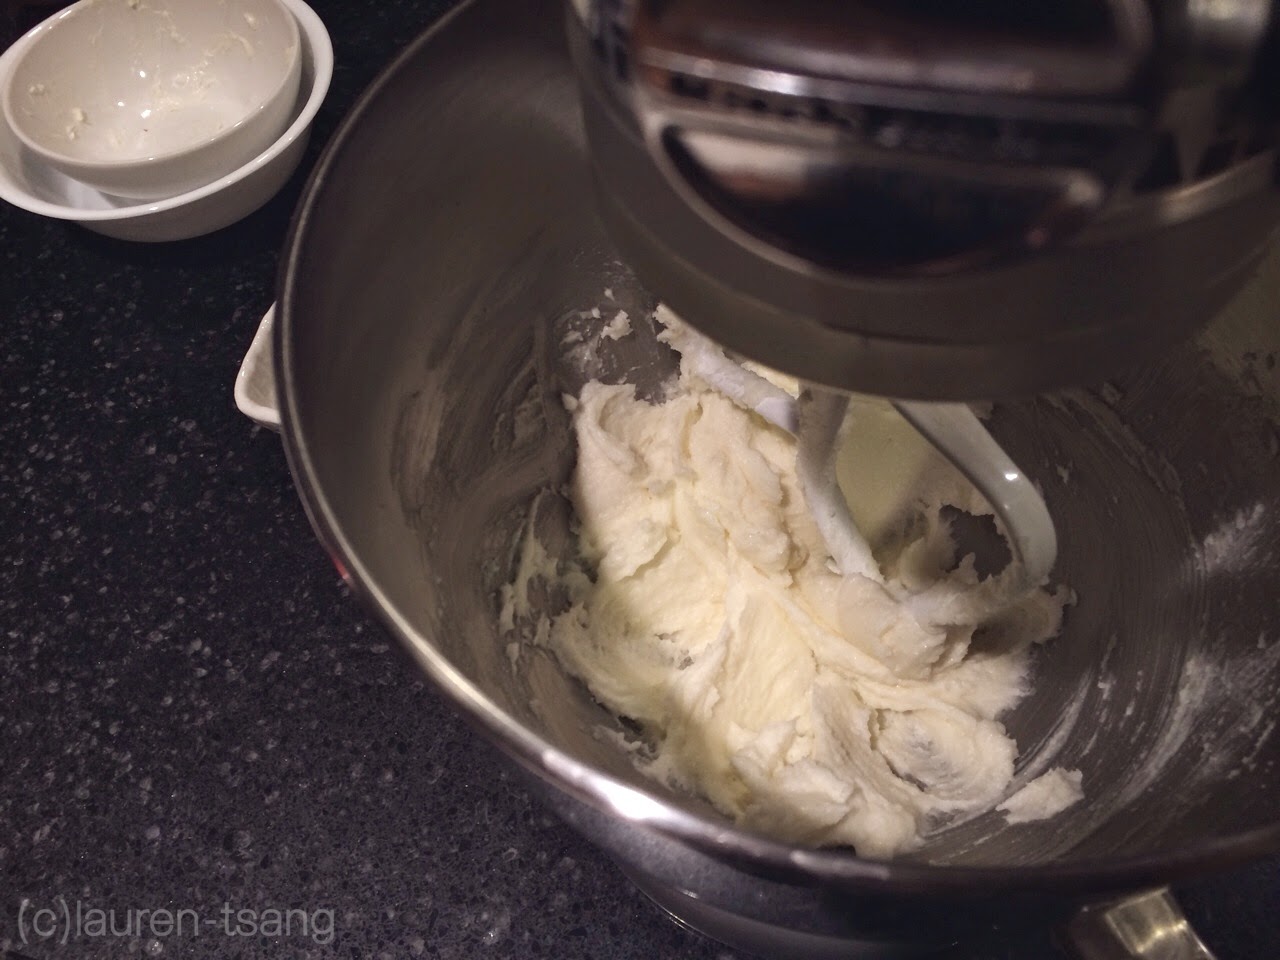
Cream together your butter, granulated sugar, and brown sugar until light and fluffyIt should look something like this. Make sure to use a rubber spatula to scrape the sides and bottom of the bowl.


Add your eggs, vanilla extract, and almond extract. Mix until well combined. Your mixture should loosen up a lot and become runny.


Add your flour mixture and mix until just incorporated. You do not want to over-mix. The dough should start forming right away and on it's own. Once combined, scrape the sides and bottom of your bowl.


Add the white chocolate chips and coarsely chopped macadamia nuts. Fold them in with a rubber spatula until they are thoroughly incorporated within your dough.


Gather two tablespoons of dough into a ball and tear it in half. Place the torn side of one half face down onto your lined cookie sheet, and place the other half on top with the torn side facing up, like shown above. These are rather large cookies so place them about 2 inches apart for spreading.


Bake your cookies for 12-13 minutes or until the edges are slightly golden. They will remain puffed up and appear undone when you take them out of the oven. Let them sit on the cookie sheet to cool for 10-15 minutes. The cookies' residual heat will finish off the insides and it will begin to flatten out. Transfer them onto a wire rack to finish cooling (but they taste the best when warm).


Quite a few people have been asking me for these lately, so I'm glad I finally found the time to make them!
The original recipe is not mine and I found it here. However, I did alter the ratios slightly and adjusted the proportions to fit my needs.
This is probably one of my favorite cookies to make and from what I've heard it's a lot of my friend's favorite too hehe.


Tuesday, July 22, 2014

Recipe: The Best Banana Bread Ever

It's been a long time coming, but I'm back again with a not-so-new recipe. Everyone has had banana bread at least once in their life, and I've come across countless recipes, but there could only be one winner.

Banana Bread

makes 2 loaves


You will need:
  • 2 cups granulated sugar
  • 2 1/2 cups all-purpose flour
  • 1 cup (2 sticks) butter (room temp.)
  • 4 eggs (room temp & beaten)
  • 6-7 (very ripe) bananas
  • 1 tsp salt
  • 2 tsp baking soda
*TIP: The riper the bananas, the better!


Preheat your oven to 350 degrees Fahrenheit. Prepare 2 2x4x8 loaf pans by coating them with butter/oil and dusting them with flour.


In a large bowl, mash your bananas. Breaking them up into small pieces makes the process a little faster and easier. I like using a fork, but if I'm in a hurry, I break out the potato masher...go big or go home!


The end result is basically a huge vat of banana guts. It is going to be a little chunky, but try to avoid super large chunks. You don't want wet spots in your banana bread. 


In a stand mixer with a paddle attachment or a hand electric mixer, cream your butter and sugar together until light and fluffy.


Add your bananas and beaten eggs and mix well. At this point your batter will look a little curdled (but it's not, don't worry it's just the bananas). In another separate bowl, sift together your flour, baking soda, and salt and mix into your batter, but just until incorporated. You do not want to over mix!!!


Divide the batter evenly between the two prepared pans. Tap each pan on a flat surface a few times to get rid of any air bubbles. Bake for 45-50 minutes. Test the banana bread with a tooth pick or skewer. Don't worry if it is still a little wet near the surface, that can happen since there are so many bananas in this recipe.


When finished baking, place pans on a wire rack for about 10-20 minutes or until they are cool enough to touch.


Once cool enough, use a butter knife or spatula to help flip the loaves out of the pans to finish cooling completely on the wire rack. (This batch's center, as you can see, remained a little wet, which is why this little crater formed while cooling.)


My dad has had this recipe for years, ever since we still lived in San Francisco ten years ago, and we have still yet to find another that has even come close to competing with ours. If you don't believe me, you're just going to have to try it for yourself!

Saturday, May 17, 2014

Recipe: Mini Banana Nutella Tarts

If you have never had a Banana Nutella sandwich at 2am, then you have not lived. Here I'm sharing with you, something even better...Mini Banana Nutella Tarts! The best midnight...or 2am snack.

I originally found this recipe for Jam Tarts, but I'm not necessarily a Jam/Jelly kind of person so then I thought, "Hey, why not use bananas and Nutella instead"?! The creativity was flowing so I ran into the kitchen and got started.

Mini Banana Nutella Tarts
with caramelized bananas

makes about 24


Pastry Crust:
  • 10 tbsp unsalted butter (room temp.)
  • 1/2 cup granulated sugar
  • 1 large egg (room temp.)
  • 1 tsp vanilla extract
  • 2 cups all purpose flour
  • 1/2 tsp baking powder
  • 1/4 tsp salt
  • about 1/2 cup Nutella
Caramelized Bananas
  • 2-3 ripe, but firm bananas
  • 1 1/2 tbsp butter
  • 3-5 tbsp granulated sugar
  • Fresh lemon juice


To begin the pastry crust, attach a paddle attachment to your stand mixer (a hand mixer will work fine), and cream together the butter and 1/2 cup of sugar on medium/high speed until light and fluffy (about 2 minutes). Be sure to scrape down the sides and bottom of your bowl as needed.


Add the egg and vanilla and beat until combined. Your mixture may look slightly curdled, but this is okay. Remember to scrape your bowl!


In a separate bowl, whisk together your flour, baking powder, and salt.


Add the flour to your mixture and beat, starting on low speed, until just incorporated. (You want to start on a low speed so flour doesn't explode in your face. You can increase the speed after a few seconds.) A ball of dough should form rather quickly so you don't want to over-mix it when it's not needed. 


As you take the dough out of the mixing bowl, it should be in pieces, so on your clean counter (you can lightly dust your counter with flour if you'd like but it isn't necessary), briefly knead the pieces together and split it in half.


Wrap the two parts in plastic wrap and place them in the fridge to chill about 45 minutes to an hour. However, if you feel that your dough is firm enough, you can proceed to roll it out. You can tell if your dough isn't firm enough if it cracks while you're rolling it out. 


Place your first ball of dough in between two large pieces of parchment or wax paper and roll out until about 1/8in thick. To prevent the paper from sliding on the counter, I put a silicon mat underneath (as seen in the picture earlier), but a slightly damp towel will work just fine. Be sure to check both sides of the dough to ensure that there are no wrinkles or cracks. Repeat with the second ball of dough. At this time, chilling your dough for about 45min to an hour is NECESSARY. You'll be handling it a lot from now on so you'll definitely want to reduce the chances of cracking. 


While the dough is chilling, this is a great time to work on the caramelized bananas! Cut your bananas into slices about 1/8in thick and place them in a shallow dish. Add your lemon juice, just enough to lightly coat the bananas. You won't be able to taste the lemon later on, this is just to prevent the bananas from browning.


In a large saucepan on high heat, melt your 1tbsp of butter until it bubbles. Add your bananas and toss until they're all coated in butter. Still on high heat, sprinkle your sugar over the top of the bananas and continue tossing until they caramelize.


Most of the butter should reduce down into a thick paste. (At this point my house smelled AMAZING.) Strain out excess butter and set the caramelized bananas aside to reach room temperature

Now is a good time to preheat your oven to 400 degrees Fahrenheit.


When your dough has finished chilling, pull the first sheet out and begin cutting out your circles (or in my case, scalloped circles). Since these are miniature tarts, a 2 1/2 inch cookie cutter will suffice.


Begin placing your dough into a miniature muffin pan (can be purchased at most craft/baking stores). 


Be gentle, because the dough can easily crack. If this happens, you can simply patch it up with a little bit of extra dough. If your dough gets too soft to handle, put it back in the fridge for another 20 minutes or so
I had to do this repeatedly since my kitchen was so hot...


Place your bananas at the bottom of each tart. One slice of banana per tart should be perfect.


Fill a Ziploc bag with the Nutella and snip off a small piece of the corner. This makes filling the tarts a lot quicker and neater. Tap the muffin pan on a flat surface a few times to flatten out the Nutella as well as releasing any air bubbles


Bake for 12-14 minutes or until the edges of the pastry are a nice golden brown. You will notice some of the caramelized banana bubble around the Nutella, but that's okay. Let them sit in the pan to cool for about 10 minutes. Afterward, use a small knife or spatula to take your mini tarts out and place them on a wire rack to finish cooling.


Top them off with a little more of that caramelized banana and you're good to go! And just FYI, these taste THE BEST when they're warm out of the oven.


The Nutella set up really nicely after being baked and the caramelized bananas tasted amazing. The Nutella and banana flavors balanced well and the pastry crust pulled it all together.

I'm quite proud of myself this time around and just saying, my coworkers loved these heheh. Let me know if you try this out and thanks for reading!

Sunday, May 11, 2014

Mother's Day Recipe: Snowball Cookies

If you tend to procrastinate on getting gifts for your well-deserving mother on Mother's day like I do, then here is my gift to you - one of the easiest cookie recipes EVER....the Snowball Cookie. 

Yeah, this cookie is more of a winter-time cookie, but it just so happens to be one of my mom's favorites, so I thought that I'd share it. This is for those of you who aren't in the kitchen too often and for those moms with a sweet tooth. 
If you're still awake at 1am scrambling to figure out what to do for Mother's Day, well here you go! What mom doesn't like homemade goods?! 

Snowball Cookies

Makes about 40


  • 2 cups all-purpose flour
  • 3 cups nuts*
  • 4-6 tbsp granulated sugar
  • 2 tsp vanilla extract
  • 2 sticks butter (room temp.)
  • 1/4 tsp salt
  • Powdered sugar, to dust (about 1 cup)
*most nuts such as almonds, walnuts, pecans, etc. will work

Prepare your baking sheets, you will need two. I lined mine with silicone mats, but parchment paper, nonstick spray, or simple butter and flour will work just fine.

Preheat your oven to 300 degrees Fahrenheit.

This recipe, for the most part, is a dump-and-mix kind of recipe, so in other words: super easy mode. In a large bowl, mix all of the dry ingredients (flour, nuts, granulated sugar, and salt). Add in the vanilla, followed by the butter in chunks
I like to cut the butter in cubes when still cold. This allows the butter to reach room temperature quicker, and makes it easier to combine into your dry mixture.
With your CLEAN hands, knead the butter into your dry ingredients


Make sure all the chunks of butter are thoroughly combined and you should get a course looking mixture. When you clump it in your hands it should be able to hold its shape. 


Using a tablespoon, scoop out heaping spoon-fulls of dough and roll them into balls. (Now here comes the dramatic change of lighting..)


Place them in the oven to bake for 35 minutes.
When finished, allow them to cool on the pan for about 5-10 minutes, until they are still warm, but cool enough to touch. This is when you want to coat them with their first layer of powdered sugar.


These cookies tend to be a little delicate when being coated with the sugar, so I pulled out this wired basket (that we usually use for hot pot..) and dipped all sides into the sugar, but use whatever is easiest for you.


Because the cookies are still warm and moist from the butter, the sugar starts dissolving onto the cookie. Allow them to completely cool.


And now that our cookies are cool, it's time for the second coat! Here we're only coating the tops so take a sifter, or a wire strainer and dust your cookies with the top layer of powered sugar. We're making it snow! Now you can see why they're called snowball cookies keke.


Snow ball cookies are crunchy, moist, and so melt-in-your-mouth good. But I've got to warn you, these are very rich (it's the butter), and quite messy, but they definitely get the Mommy Stamp of Approval.

Happy Mothers Day